A shingle roof rarely fails overnight. It sends signals, sometimes loud, often subtle, long before water stains bloom on drywall. Catch those early, and you can fix a small problem for a few hundred dollars instead of replacing half the deck. I have spent enough time on ladders and in attics to know that the best roof work starts with disciplined observation and a practical plan. This guide walks through how to read the signs, decide what to repair now, and when to consider roof shingle replacement, with a clear path to working with a shingle roofing contractor when the job outgrows a DIY fix.
What “normal” looks like on a healthy shingle roof
A well-installed, well-ventilated shingle roof lies flat and consistent. The tabs line up, the granules feel gritty, not sandy, under your hand, and the ridge cap shingles are snug with uniform bends. Flashing around penetrations, such as vent stacks and skylights, sits flush without gaps. Gutters are free of heavy granule piles. In the attic, sheathing is dry, fasteners are not rusted, and you can’t smell mold. If this is your baseline, you’ll notice early damage more easily because deviations jump out.
Materials matter. Three-tab shingles, common on older homes, tend to show uniform wear and are more prone to wind uplift as they age. Architectural (laminated) shingles, thicker and heavier, often hide small cracks but show granule loss in scuffed patches. Asphalt formulations vary, but you can expect 15 to 20 years from basic three-tab and 20 to 30 years from mid-grade architectural shingles in temperate climates, assuming proper roof shingle installation and ventilation. Desert sun, coastal salt, heavy ice, or tree cover can move those numbers several years in either direction.
The first signs most homeowners miss
On most inspections that lead to shingle roof repair, the issue started months earlier. A few early-warning clues are easy to ignore until they add up.
Granule accumulation shows up first. A handful of sand-like grains in the gutter after a storm is normal for a newer roof due to manufacturing residue. A cup or more repeatedly, or a fine black strip at your downspout outlet, points to accelerated wear. Look where the downspout empties onto concrete after a hard rain. If you can brush a dark fan of grit with your hand, check the slope above for bare patches.
Edges tell stories. The lower three feet of any slope takes the brunt of wind, ice, and foot traffic. Find curling or cupping along eaves and rake edges first. Cupped shingles catch wind, and once a corner lifts, water finds its way under. A lifted tab today can be a torn tab tomorrow.
Pay attention to the “fuzz” on ridge caps. When a ridge cap frays or cracks before the field shingles, you may have a venting issue. Heat gathers at the ridge. If the attic runs too hot, ridge caps dry out and split, even if the field looks fine. This is a solvable problem, but you need to address ventilation along with any shingle replacement on the ridge.
Flashing fatigue is a quiet leak maker. Rubber boots around plumbing vents can crack in a clean oval right at the collar. It can look like a hairline at first, but it grows fast with UV exposure. Metal step flashing at sidewalls can also slip if mortar crumbles or siding moves. These fail points often leak before shingles do.
Inside the house, look beyond ceiling stains. Stick your head in the attic after rain. Use a flashlight to scan sheathing for dark tracks following a nail line. Rust on nail points is a giveaway, especially in winter. I have seen people repaint a ceiling stain three times over six months, only to find a cracked boot that costs less than a dinner out.
Weather, trees, and time: how damage usually starts
Every roof ages under its specific environment. If you live in a windy corridor, the predominant wind direction shapes your inspection priorities. The windward slopes show more lifted tabs and torn sealant strips. In hail country, the story changes. True hail damage leaves circular spots where granules are crushed, not scraped. You’ll see soft bruises that give under thumb pressure on newer shingles, or shiny black asphalt “craters” on older ones. If you see linear scrapes aligned with foot traffic or ladders, that is mechanical abrasion, not hail.
In freeze-thaw climates, ice can form along the eaves and push water under the first courses. If you notice shingle edges with a scalloped look near the drip edge, or a ripple in the first two rows after winter, water likely found its way under and expanded the decking slightly. Ice and water shield installed at the eaves helps, but poor attic insulation and ventilation often feed the ice dam cycle.
Tree cover changes the microclimate of a roof. Constant shade keeps shingles wet longer, encouraging algae and moss. Algae streaks look cosmetic, but moss is destructive. It grows under shingle edges and lifts them. If you see moss, you have moisture and debris that need solving along with any roof shingle repair.
Sun bakes roofs in the Southwest and high altitudes. Asphalt dries and becomes brittle faster. You’ll find more surface cracking and granule loss on south- and west-facing slopes. Expect a 5 to 7 year shorter service life on these exposures compared to the shaded north slope of the same house.
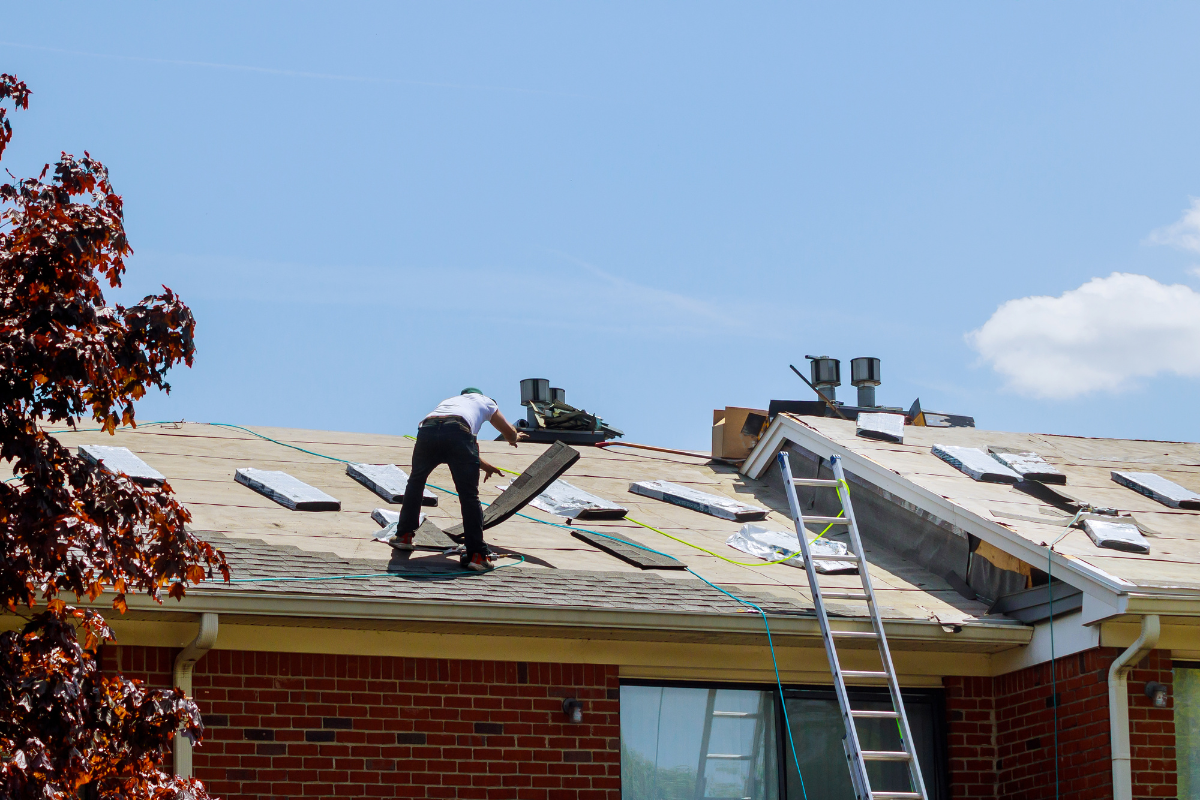
A practical inspection routine that actually works
You can learn more in 45 minutes with a ladder and a flashlight than in hours of guessing. Start safe. Only climb if your ladder is rated for your weight, has stable footing, and you can anchor it properly. If not, use binoculars from the ground and inspect the attic thoroughly. Many early issues can be spotted without stepping on shingles.
Begin with a slow walk around the house. Look up at eaves and rakes for uneven lines or lifted tabs. Check valleys for shingle ends that have migrated into the metal, which can channel water sideways. Scan the ridge for cracked caps.
Next, open the gutters and check for granules, asphalt “mud,” and shingle pieces. Heavy granules in one section often point to a nearby patch of wear. While there, inspect the drip edge and fascia for water streaks or soft spots that suggest overflow or ice dam issues.
From inside the attic, go during or right after a rain if possible. A headlamp makes it easier to see sheen on nails. Touch the sheathing near vent stacks and valleys. If you feel dampness or chilled air coming through a nail cluster, water may be wicking along fasteners from a small breach above. Also inspect insulation. Wet batts feel heavy and slump, even if the wood above looks dry by the time you check.
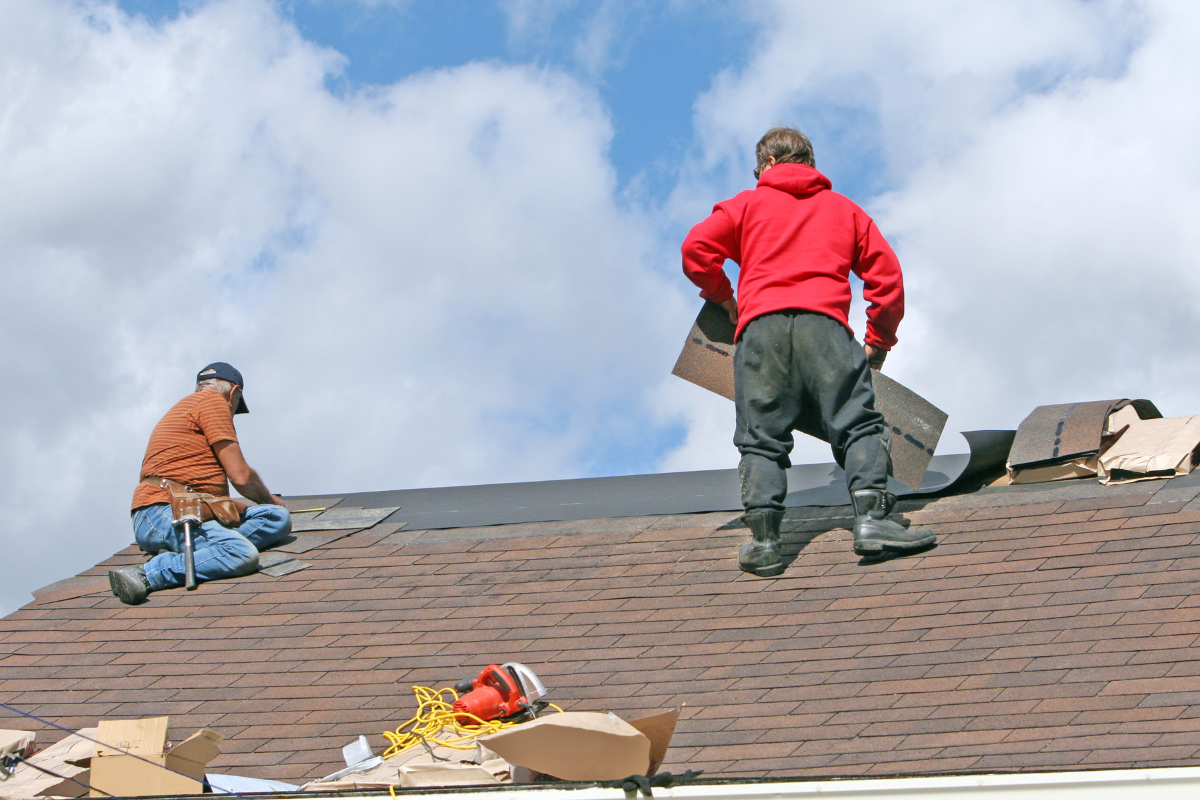
If you go on the roof, minimize foot traffic. Architectural shingles are more forgiving than three-tab, but heat softens asphalt, and footprints can grind off granules. Step on the butt ends, not the tabs. Test suspect shingles with gentle pressure. A brittle shingle will crack easily when lifted. If sealant strips separate cleanly with a flat bar on a temperate day, the adhesive has aged out. That doesn’t always demand immediate replacement, but it increases wind risk.
Sorting repairs from replacements
Not every defect demands tearing off half your roof. The size, location, and pattern of damage guide the decision.
Isolated mechanical damage, such as a torn shingle from a branch or a few missing tabs after a wind gust, can be solved with a simple roof shingle repair. You can replace individual shingles on most roofs without disturbing the field beyond the course above and below. Expect a minor color mismatch if the roof is older. That mismatch weathers in over a season or two.
Systemic aging is different. When granule loss is widespread, or you can lift shingles easily across multiple slopes, you are looking at end-of-life behavior. If 15 to 20 percent of a slope shows recurring cracks or curling, patching buys you months, not years. In those cases, roofing dollars spent on repeated small fixes might be better pooled toward roof shingle replacement. On a typical single-story, 1,800 square foot roof, a patch might cost 300 to 800 dollars for a small area, while a full replacement runs from about 6,000 to 14,000 dollars depending on region, tear-off complexity, and shingle grade. Numbers fluctuate with labor and materials, but the ratio holds.
Location matters. A missing shingle mid-field sheds water around it, but a bad shingle in a valley or at a penetration can leak ten times faster because water concentrates there. I treat valleys, chimney flashings, and lower eaves as priority zones. If something is off in those areas, fix it soon, even if the rest of the slope looks fine.
Consider age and warranty. If you are within the first five to seven years of a roof shingle installation and you see early cracking across a batch, pull your paperwork. Some manufacturers will prorate materials for premature failure, especially if a known production issue occurred. A shingle roofing contractor familiar with the brand can help document and navigate a claim.
Planning the repair with a clear scope
Clarity prevents scope creep. Write out the specific defects you need addressed, along with location, quantity, and any related risks. For example: replace six torn shingles on the south slope near the ridge, reseal and re-nail lifted tabs on the lower two courses along the west eave, replace two cracked pipe boots with new neoprene-copper collars, re-bed chimney counterflashing mortar, and clear and flush gutters. If you hire, this kind of scope signals that you’ve done your homework and reduces vague allowances.
Material matching can be tricky for older roofs. Take a shingle sample or high-resolution photos into a supply house. Manufacturers print codes on the underside, but you might not have a spare piece handy. If an exact match is unavailable, choose a color blend that https://keeganjuuj656.iamarrows.com/budgeting-for-roof-shingle-installation-what-to-expect is one tone darker rather than lighter to keep patches less visible from the street. On architectural shingles, pattern alignment matters. A seasoned crew staggers replacements to blend the patch.
Pay attention to fasteners and sealants. Use the correct length roofing nails so they penetrate the decking by about 3/8 to 1/2 inch. Short nails are common culprits behind slip-outs. For sealants, roof-grade asphalt mastic works in moderation, but it is not a cure-all. I see too many smears of tar where a boot should have been replaced. Use mastic to seal flashing laps, nail heads on exposed metal, and to set tabs in cold weather, not to mask fundamental failures.
If you suspect ventilation problems, fold that work into your plan. Add intake at soffits if you lack it, or upgrade ridge venting where airflow is bottlenecked. A roof that breathes evenly ages more gracefully. I have watched a 5 to 10 degree reduction in attic temperature extend shingle life meaningfully by reducing summer bake and winter freeze cycles.
DIY or call a pro: making the right call for safety and quality
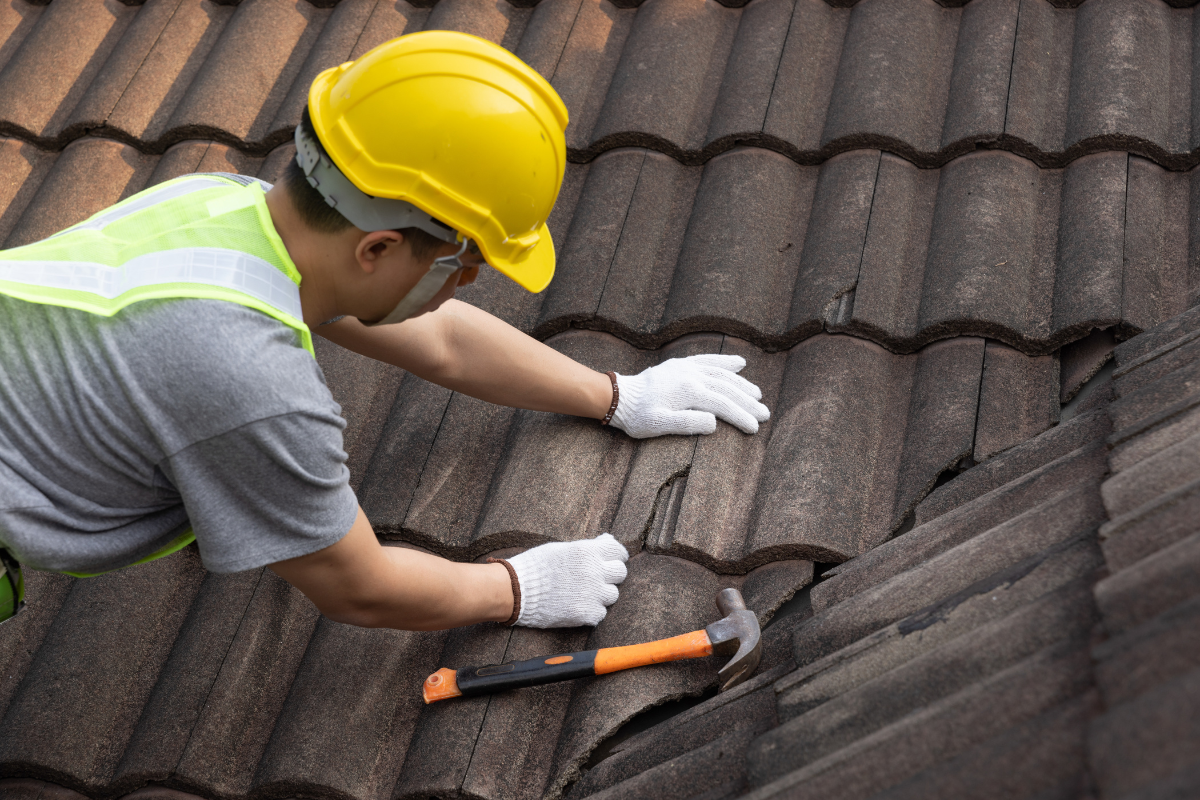
Some roof shingle repair tasks are accessible to a careful homeowner with modest tools. Replacing a single torn three-tab shingle on a low-slope ranch is not brain surgery. A flat bar, hammer, roofing nails, a utility knife, and a tube of roof sealant will do it. Replacing a sun-cracked rubber boot on a one-story roof is likewise manageable if you are comfortable on ladders.
Complex tasks justify a shingle roofing contractor. Valleys, chimneys, skylights, multi-layer tear-offs, and steep pitches move beyond DIY. Insurance claims or suspected hail damage also benefit from a professional inspection, because documentation and proper identification of true hail bruising matter for coverage. Pros bring harnesses, toe boards, magnetic sweepers, and a crew that can stabilize a partially opened roof quickly if weather shifts. Safety alone is a compelling reason.
Choose contractors with verifiable local experience. Ask about their process for small repairs, not just replacements. Good companies will schedule a repair tech with a stocked truck, not just a salesperson quoting full reroofs. Look for a workmanship warranty on repairs, typically 1 to 3 years. If they only talk about manufacturer warranties, ask how their workmanship coverage works when the fix is confined to a small area.
Cost ranges, timelines, and what to expect on the day
Small repairs usually price by the trip and the task. A service call fee plus a per-shingle or per-flashing rate is common. Replacing a pipe boot might run 150 to 400 dollars in many markets. A valley reshingle across 6 to 8 feet can range from 300 to 900 dollars depending on roof height and access. Prices swing with region and season. Urgent calls during a storm week cost more because crews are stretched.
Most repairs finish in under half a day. Protect landscaping and AC condensers with tarps if tear-off is involved. Ask the crew to sweep the area with a magnetic roller. On hot days, expect a bit of asphalt smell. It fades quickly. If rain threatens, a prepared crew carries synthetic underlayment and blue tarps to secure the area in minutes. A pro will never open more roof than they can close before weather hits.
For roof shingle replacement, plan for a two to four day project on an average home, depending on layers to remove, decking repairs, and the complexity of flashings. If the crew discovers rotten sheathing, they should show you photos and price per sheet replacement before proceeding. Build a 10 percent contingency into your budget for such surprises.
Repair techniques that last
Good repairs blend technique with restraint. Overnailing cracks shingles. Undernailing lets them move. The sweet spot is four nails per shingle in mild zones, six in high wind areas, placed just above the tar line. When sliding in a replacement, break the sealant strip carefully with a flat bar and heat from the sun if possible. Cold shingles crack. In winter, a heat gun on low helps release stubborn bonds, but use it sparingly.
With architectural shingles, mind the laminated layers. Lift only what you must, and align the exposure carefully so the shadow lines remain consistent. A poorly aligned architectural patch is visible from the street. For three-tab, matching the keyway spacing prevents a zipper effect.
Flashing work deserves surgical care. Step flashing should interleave with each course of shingles, not be layered in big sheets. Counterflashing at chimneys should be ground into a mortar joint or tucked under siding, not surface-glued with mastic unless as a short-term emergency measure. Replace rusted or paint-blistered metal. Metal lasts decades when installed right, and it is often the difference between a roof that remains dry and one that leaks again within a season.
Preventive care that buys you years
Roofs do better when the small things stay under control. Trim branches back so they do not sweep the surface during wind. Debris piles in valleys act like sponges. Clean gutters at least twice a year so water does not back up under the first courses. If you see algae streaks and want cosmetic improvement, use a gentle wash with a manufacturer-approved cleaner and low-pressure application. High-pressure washers tear off granules and shorten a roof’s life.
Ventilation and insulation are the twin pillars beneath the shingles. Adequate soffit intake and ridge exhaust reduce attic heat and moisture. Insulate the attic floor to code or better, and air-seal around can lights and chases to prevent moist indoor air from condensing under the sheathing in winter. The best shingle roofing has more to do with the air below than many people assume.
Keep records. A simple log of dates, work done, photos, and receipts helps you track patterns. If the same spot needs attention twice in three years, probe deeper. You might have a framing quirk or a vent stack that moves with thermal cycles. A log also helps when selling the house, because buyers respect documented maintenance.
When a roof is telling you it is done
There is a point where repairs become palliative care. If shingles crack under light finger pressure across a slope, the asphalt has dried out. If you see widespread alligatoring, where the surface shows a network of fine cracks, the top coat is gone and water will find pathways with the next freeze-thaw. If you have multiple leak points across different planes, especially after you have addressed flashings and boots, the field material itself is failing.
When planning roof shingle replacement, look beyond color. Wind ratings, impact resistance, and algae resistance all matter in different climates. Upgrading from a basic three-tab to an architectural shingle brings better wind performance and often a longer warranty for a few hundred dollars more per square. Impact-rated shingles cost more, but in hail-prone regions they can reduce insurance premiums and minimize future bruising. Ask your shingle roofing contractor to price options side by side and explain the rationale, not just the brand slogans.
Think through ventilation and underlayments as part of the replacement. Ice and water shield at eaves and valleys, synthetic underlayment on the field, and proper intake and exhaust will give your new roof a fair shot at reaching its rated life. Ridge cap shingles should match the field product in quality, not be an afterthought.
Working smoothly with a contractor
The relationship with your contractor influences the result as much as the materials. Communicate how you will measure success: no leaks, clean site, minimal landscape disturbance, photo updates for any hidden damage. Ask to see the nailing pattern on a sample area and confirm nail guns are set to proper depth. Overdriven nails cut shingles and cause future slip-outs.
Request that all penetrations receive new flashings unless recently replaced. Reusing old boots to save a few dollars is common on rushed jobs and almost always regretted. For chimneys, insist on counterflashing that is cut in, not face-sealed. For skylights, follow manufacturer kits rather than improvised pans.
Confirm disposal and cleanup. Old nails in a driveway linger for months if the crew skips a thorough magnet sweep. Ask them to protect AC units and garden beds with breathable tarps, not plastic that cooks plants in the sun. Small courtesies add up to a better experience.
A short, practical checklist for early detection and planning
- Walk the perimeter after storms and scan for lifted tabs, missing shingles, and ridge cap cracks. Check gutters for unusual granule buildup and clear valley debris before it mats. Inspect the attic with a flashlight for rusty nail points, dark sheathing tracks, and damp insulation. Examine flashings and boots, especially around plumbing stacks and chimneys, for cracks or gaps. Document issues with photos, define a repair scope, and decide whether DIY or a shingle roofing contractor is the right call.
Final thoughts from the roofline
A shingle roof rewards attention. Early damage rarely looks dramatic: a small curl at the eave, a ring of granules under the downspout, a hairline crack at a pipe boot. Those little flags, addressed promptly, keep water from getting a foothold in the system. Plan your shingle roof repair with precision, match materials thoughtfully, and treat flashings as first-class citizens. When it is time to replace, choose products and details that fit your climate and house, and partner with a contractor who values craft over speed.
Whether you maintain your own home or manage properties, the rhythm is the same. Observe, verify from the attic, prioritize high-risk zones, and act before damage compounds. That discipline stretches the life of your shingle roofing and keeps surprises off your ceilings and off your budget.
Express Roofing Supply
Address: 1790 SW 30th Ave, Hallandale Beach, FL 33009
Phone: (954) 477-7703
Website: https://www.expressroofsupply.com/
FAQ About Roof Repair
How much should it cost to repair a roof? Minor repairs (sealant, a few shingles, small flashing fixes) typically run $150–$600, moderate repairs (leaks, larger flashing/vent issues) are often $400–$1,500, and extensive repairs (structural or widespread damage) can be $1,500–$5,000+; actual pricing varies by material, roof pitch, access, and local labor rates.
How much does it roughly cost to fix a roof? As a rough rule of thumb, plan around $3–$12 per square foot for common repairs, with asphalt generally at the lower end and tile/metal at the higher end; expect trip minimums and emergency fees to increase the total.
What is the most common roof repair? Replacing damaged or missing shingles/tiles and fixing flashing around chimneys, skylights, and vents are the most common repairs, since these areas are frequent sources of leaks.
Can you repair a roof without replacing it? Yes—if the damage is localized and the underlying decking and structure are sound, targeted repairs (patching, flashing replacement, shingle swaps) can restore performance without a full replacement.
Can you repair just a section of a roof? Yes—partial repairs or “sectional” reroofs are common for isolated damage; ensure materials match (age, color, profile) and that transitions are properly flashed to avoid future leaks.
Can a handyman do roof repairs? A handyman can handle small, simple fixes, but for leak diagnosis, flashing work, structural issues, or warranty-covered roofs, it’s safer to hire a licensed roofing contractor for proper materials, safety, and documentation.
Does homeowners insurance cover roof repair? Usually only for sudden, accidental damage (e.g., wind, hail, falling tree limbs) and not for wear-and-tear or neglect; coverage specifics, deductibles, and documentation requirements vary by policy—check your insurer before starting work.
What is the best time of year for roof repair? Dry, mild weather is ideal—often late spring through early fall; in warmer climates, schedule repairs for the dry season and avoid periods with heavy rain, high winds, or freezing temperatures for best adhesion and safety.