If you have ever pulled off a strip of soaked drywall beneath a valley or watched water trace a nail line across roof decking, you know the sinking feeling that comes with an avoidable leak. Shingle roofs are remarkably durable for the cost, yet they have two vulnerabilities that show up repeatedly on service calls: water driven by wind, and water that backs up where it shouldn’t, especially around eaves and penetrations. Ice and water shield exists to address those specific vulnerabilities, and when it is installed thoughtfully, it changes the lifespan and reliability of a roof.
This isn’t a magic membrane that excuses sloppy work. It is a specialized self-adhered underlayment designed to seal around nails and hold the line where shingles alone cannot. I have been on roofs where a one-foot strip of it, properly tucked under a valley cut, kept a home dry through a hurricane. I have also peeled back buckled shingles to find bargain-bin felt alone, rotten decking beneath, and repair bills that dwarfed the cost of doing it right in the first place. Understanding how this product fits into shingle roofing helps homeowners, builders, and even seasoned installers make better decisions during roof shingle installation, roof shingle repair, and roof shingle replacement.
What ice and water shield actually does
Ice and water shield is a rubberized asphalt or butyl-based membrane with a self-adhesive backing and a top surface designed to accept shingles. The material is tacky, which allows it to bond to clean decking and to seal around fastener penetrations. Once pressed down, it creates a watertight barrier under the shingles. Unlike traditional underlayment that sheds water only if it stays intact and unperforated, this membrane anticipates the reality of nail holes and high-pressure water.
There are variations in composition. Most common rolls are 36 inches wide, though some come in 60-inch widths for valances and large coverage. Standard products use rubberized asphalt, which performs well in a wide climate range. High-temperature membranes, often with a butyl base and an upgraded top film, are designed to live under metal, tile, or dark shingles on low-vented decks where surface temps get punishing in July. When I work on homes with standing seam accents or black shingles over a cathedral ceiling, high-temp is non-negotiable.
The key functions are straightforward: resist ice dams from backing water up beneath shingles at the eaves; seal around nails at valleys, rakes, and penetrations; and provide a secondary water barrier where wind can push rain sideways and uphill under the shingle tabs.
Where a shingle roof most often fails
After enough tear-offs and leak hunts, patterns emerge. On shingle roofing, four areas take the most abuse: eaves, valleys, roof-to-wall intersections, and penetrations like chimneys, skylights, and plumbing stacks. If you have to pick your battles for budget or complexity, these are where ice and water shield pays back.
Eaves are where warm interior air melts the underside of snow. Meltwater flows down until it reaches the cold overhang, freezes, and forms an ice dam. The water behind that dam has nowhere to go except under the shingles. Once water reaches nail penetrations and decking seams, it wicks and stains. The shield is designed to stop that migration. Properly installed, it extends from the edge of the roof up past the interior warm wall line, typically 24 inches inside the heated space in most codes, more in severe zones.
Valleys gather the most water per square foot. They also concentrate debris, and they are susceptible to wind-driven rain that defies gravity. Any fastener through the center of a valley becomes a highway for water if there is no self-sealing underlayment. I have replaced more valley decking than any other location on older roofs without a membrane, especially on homes with tall trees.
Penetrations and roof-to-wall transitions are a mix of carpentry and chemistry. Flashing does the heavy lifting, but on a windy night, rain can be pushed uphill several inches. The ice and water shield catches that water, seals the nail lines, and buys time if a bead of sealant fails or a counterflashing lifts.
Codes, warranties, and what they leave unsaid
Most building codes in North America require an ice barrier in cold climates, defined as two layers of underlayment cemented together or a self-adhering polymer modified bitumen sheet, installed from the eave to a point at least 24 inches inside the warm wall line. Many-municipality amendments expand that to 36 inches inside the warm wall in heavy snow regions. Insurance adjusters and inspectors look for this detail after water-damage claims.
Manufacturers’ warranties on shingles often reference “ice dam protection” or “ice barrier” in their enhanced warranty tiers. What they do not always highlight is that a failure to install this membrane in the prescribed areas can limit coverage. A careful read of fine print shows that wind-driven rain is frequently excluded unless the full system was installed, including ice and water shield where specified.
Even where codes do not require it, local weather and roof design should. On coastal houses with low-slope gables and little overhang, wind is the driving threat, not ice, yet the same membrane solves both.
Installation details that separate good from good enough
Every roof has quirks, but a few constants define a proper installation.
Start with clean, dry decking. If the plywood is damp from overnight dew, run a leaf blower across the surface, then give it a little time. The membrane will not bond properly to wet wood, and adhesion is its main advantage.
At the eaves, I like to run the membrane directly over the drip edge in warm zones and under the drip edge with a second strip over the top in cold zones to lock out water that cycles across that metal edge. Some installers prefer the membrane first, then drip edge, then a 6-inch strip of membrane over the flange. The goal is the same: prevent capillary action and ice expansion from finding a seam. Keep the membrane tight and unwrinkled, because a fishmouth today becomes a bubble that telegraphs through shingles tomorrow.
In valleys, run a full-width strip centered in the valley, then another course on each side if the valley is steep or unusually long. Avoid fasteners within 6 inches of the valley centerline. If you lay a woven or closed-cut shingle valley, the sealed underlayment protects you from those inevitable nail penetrations near the line.
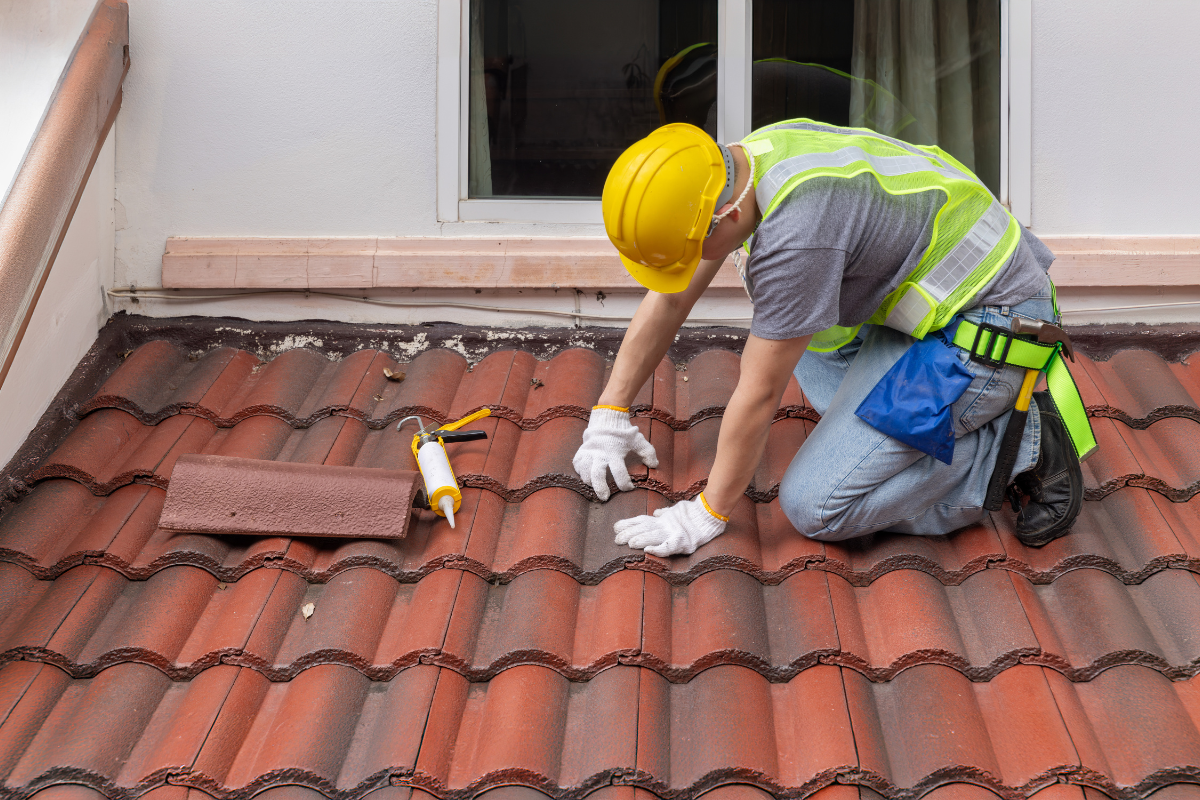
Around chimneys and skylights, think like water. Wrap the curb or chimney base with the membrane lapped shingle-style, bottom first, sides next, top last. Do not rely on the membrane to replace sheet metal flashing. It is a belt to the flashing’s suspenders. When you reflash a chimney during roof shingle repair, add a neat skirt of membrane that extends up the curb and out onto the deck 6 to 9 inches under the shingles. Subtle, but it saves call-backs.
At rakes, a narrow strip under the starter course https://www.google.com/maps/place/Express+Roofing+Supply/@25.9948714,-80.1666639,17z/data=!3m1!4b1!4m6!3m5!1s0x88d9ab108fc5d417:0x204a6f9320b88b32!8m2!3d25.9948714!4d-80.1666639!16s%2Fg%2F11vt0cyxb5?entry=ttu&g_ep=EgoyMDI1MDgyNC4wIKXMDSoASAFQAw%3D%3D can help on windward edges. It is not always necessary, but on tall, exposed gables, or houses on the edge of open fields, I have seen sideways rain lift the first course and wet the decking beneath. An extra strip there turns a risk into a non-event.
Finally, roll the membrane with a weighted roller where possible. Hand pressure works, but a roller ensures full adhesion without air pockets, especially in cooler weather.
Choosing the right product for your roof and climate
No two membranes are identical. The right choice depends on climate, roof pitch, roofing material, and attic ventilation.
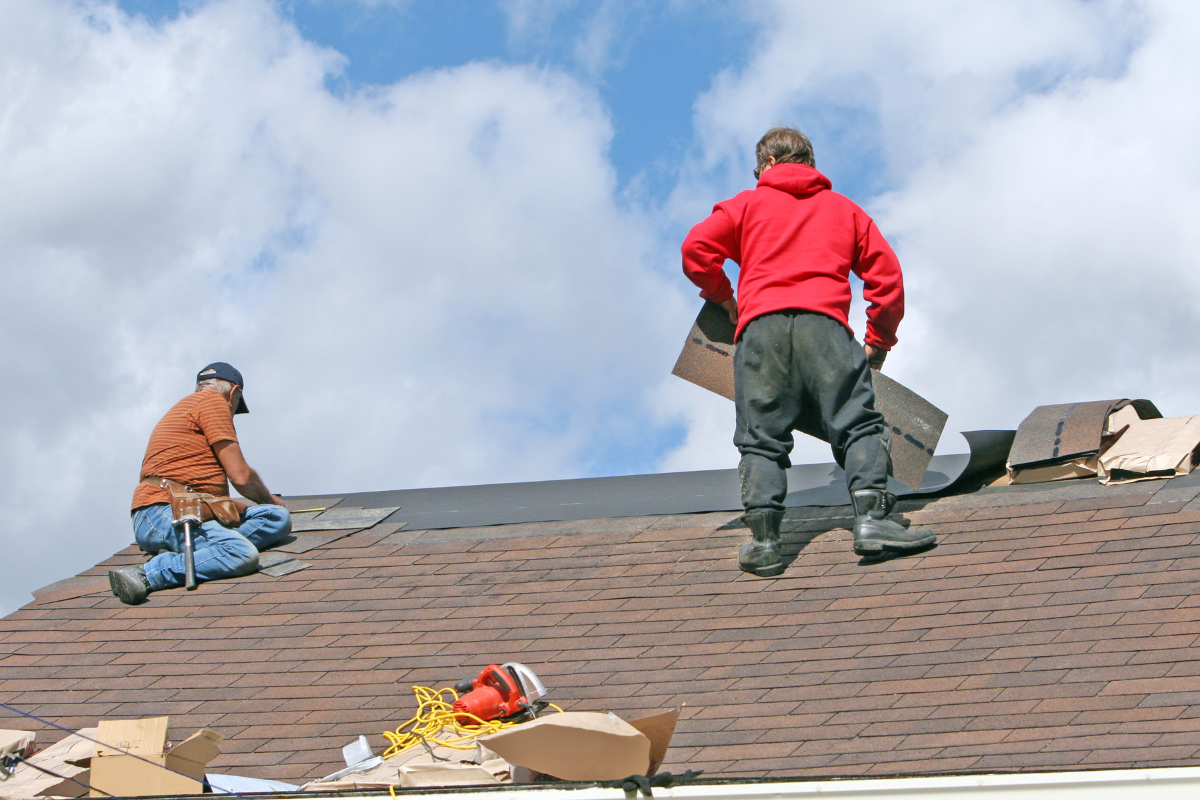
In standard asphalt shingle roof applications in mixed climates, a quality rubberized asphalt membrane with a granular or polymer top surface is sufficient. The granular feel underfoot also provides safer footing during roof shingle installation.
In hot climates or under metal or dark shingles on low-slope decks with limited airflow, choose a high-temperature rated product. You will see ratings at 240 degrees Fahrenheit or higher for the service temperature. In my experience, anything less under a dark standing seam will print, creep, or weld itself to the metal in August, making any future shingle roof repair or flashing work a nightmare.
For complex roofs with lots of dormers and penetrations, wider rolls reduce seams and speed up work. A 60-inch roll can make quick work of a cluster of skylights.
Adhesion in cold weather varies. Some membranes have aggressive adhesives that bond well down to 25 degrees Fahrenheit, others recommend a primer or delay until warmer temperatures. Pushing the envelope invites blisters and inadequate bonding. On winter projects, I often use primer at penetrations and valley centers and leave field sections for warmer afternoons.
Common mistakes that lead to callbacks
Over and over, the same missteps show up when we respond to leaks on relatively new roofs. The most common is stopping the eave membrane short of the interior warm wall line. On a 12-inch overhang and a 24-inch roll, that first strip often falls two or three inches shy of safe. Add one more course.
Next is poor integration with drip edge. Letting the membrane terminate at the edge without a proper overlap over or under the metal flange invites capillary action. Water doesn’t need much of a gap.
Third is excessive nailing in valleys. Fasteners within the center 6 inches defeat the purpose. Train the crew, or mark the valley with chalk and a reminder before shingle layout.
Fourth, relying on membrane alone around a chimney or skylight. It is tempting to think of self-adhered underlayment as a cure-all. It is not. You still need step flashing, counterflashing, and a saddle on the high side of wide chimneys.
Lastly, skipping it altogether on low-slope roofs because “we never get snow here.” Wind-driven rain can push water uphill several inches on a 3/12. I have seen summer storms in the Southeast mimic the damage pattern of an ice dam. One summer of sideways rain can equal a decade of freeze-thaw cycles.
The dollar math: cost versus value
Homeowners often ask if ice and water shield is worth the cost. On a typical 2,000-square-foot roof with standard eaves and two valleys, the material cost for quality membrane might add a few hundred dollars compared to felt alone, more if you wrap every penetration and run extra courses. Labor adds a modest premium for careful detailing. Against that, consider the cost of cutting out water-stained drywall, repainting, and replacing rotten decking near a valley. One leak event can easily surpass the entire added cost of proper membrane coverage.
On roof shingle replacement projects, especially after storm damage, insurance may cover code-required membrane. Even when it does not, many adjusters will allow it when the contractor documents pre-existing conditions like low ventilation, pronounced valleys, or heavy tree cover. A shingle roofing contractor who understands both building science and insurance documentation can often justify the upgrade and protect you from future claims.
Tying membrane strategy to ventilation and insulation
Ice dams form because of uneven roof temperature, which comes from inadequate insulation or ventilation. Ice and water shield mitigates damage, but it doesn’t solve the underlying cause. When planning roof shingle installation or a full tear-off, look at the whole assembly.
In vented attics, aim for balanced intake and exhaust, a clear airflow path, and sufficient insulation at the ceiling plane. If the roof has a cathedral ceiling with closed rafter bays, high-temp membrane under the entire field is warranted in many climates, along with rigid insulation above the deck or vent chutes below it to cool the underside of the shingles.
I have seen houses that added beautiful crown molding and recessed lights below a poorly insulated eave. The heat loss at that eave line was enough to melt snow above, building a consistent dam. Ice and water shield kept the living room dry, but the best fix was dense-packing the eave bays and improving the soffit vents during the next roof shingle repair.
How membrane choices affect future repairs
Think ahead to maintenance. A well-installed membrane makes shingle roof repair cleaner. When you need to replace a plumbing boot or reflash a dormer, finding a self-sealing underlayment beneath gives you a safety net. You can lift a few courses without anxiety that a sudden shower ruins the day.
There is a trade-off. Very aggressive adhesives bond so strongly that removing small sections years later can tear up the top ply of plywood if you are not careful. I carry a flat bar and a heat gun on repair days for this reason. A little warmth softens the bond and keeps the deck intact. If your home has older plank decking, gentle heat and patience matter even more.
Real-world examples from the field
A lakefront home in northern Michigan had a simple gable roof, 8/12 pitch, two valleys feeding a large eave. The homeowners had replaced shingles 12 years earlier without a membrane at the eaves, relying on felt. After a heavy snow, water found the nail line two feet up from the soffit and stained the kitchen ceiling. During replacement, we ran two courses of high-quality membrane at the eaves, extending 36 inches past the warm wall, then centered the valleys with a full-width strip plus 18 inches on each side. The next winter brought a worse freeze-thaw cycle, but the ceiling stayed untouched.
On a coastal Carolina bungalow, wind was the enemy. The roof had minimal overhang and a 4/12 pitch. Pre-storm inspections showed evidence of wind-driven rain under the first course. We added a narrow strip of membrane along the rakes and eaves, integrated with drip edge and starter shingles, then reinforced the valley. After a tropical storm that summer, the homeowner reported no interior moisture while neighbors with similar houses chased leaks.
In Denver, a modern home with a low-slope section tied into a steeper shingle field had solar conduits crossing the transition. The installer had not used high-temp membrane, and heat from the dark shingles plus the conduit’s proximity softened the underlayment. During a roof shingle repair, we swapped in high-temp membrane across the transition, sleeved the conduit, and corrected fastener placement. The change wasn’t visible from the ground, but it ended a recurring stain on the upstairs hallway.
When going beyond the minimum makes sense
There are roofs where full-field coverage with ice and water shield is prudent. Low-slope assemblies at 2/12 to 4/12 in cold or windy climates, complex roofs with many penetrations, and cathedral ceilings with limited venting benefit from more coverage. Manufacturers usually allow full coverage under shingles with a breathable synthetic underlayment above it in some assemblies, though this is a specialized approach and should be paired with careful attention to moisture control in the attic. On older homes with plank decking, I still lean toward targeted coverage unless the building science is vetted, because trapping moisture against seasonal gaps can cause unexpected condensation.
For most homes, a sensible approach is eaves, valleys, and critical penetrations. Add rakes on windward sides and roof-to-wall transitions where siding detail allows a proper lap.
How to talk about membrane with your contractor
Homeowners do not need to learn every product code, but a short, clear conversation prevents assumptions. Ask where the contractor plans to use membrane, what type, and why. Request that the eave coverage extend inside the warm wall line per your climate. Confirm high-temp membrane where appropriate. For roof shingle replacement, ask for photos at each stage: bare deck, membrane down, flashing details, shingle layout. Good crews document their work and will happily show you the details.
If you are vetting a shingle roofing contractor, listen to how they explain valleys and penetrations. If they brush off the membrane as optional everywhere, or if they treat it as a cure-all that replaces flashing, keep looking. The right answer sits in the middle: use it strategically, integrate it properly, and pair it with sound flashing and ventilation.
A brief, practical checklist
- Verify eave coverage extends at least 24 inches inside the warm wall line, more in heavy snow zones. Center a full-width strip in each valley, keep fasteners 6 inches off center, and add side courses for steep or long valleys. Wrap penetrations and roof-to-wall areas with membrane under proper step and counterflashing. Use high-temperature membrane under metal, dark shingles on hot decks, or low-vented assemblies. Integrate with drip edge thoughtfully to block capillary action at edges.
Final thoughts from the roof
Roofs fail in the smallest places. A nail a few inches too close to a valley, a strip of underlayment that stops shy of the warm wall, a bead of caulk that dries and cracks behind a chimney. Ice and water shield is less visible than a handsome shingle and less dramatic than copper flashing, yet it quietly earns its keep year after year. It is a simple product that, installed with care, turns those small places from weak points into a safety net.
Whether you are scheduling roof shingle installation on a new build, planning a roof shingle replacement after a storm, or calling for shingle roof repair to chase a stubborn leak, make the membrane part of the conversation. Not as an upsell or a magic fix, but as one of the fundamental components that make shingle roofing work in the real world where wind, water, and time always look for shortcuts. The cost is predictable, the technique is teachable, and the payoff is a dry house on the worst weather day of the year.
Express Roofing Supply
Address: 1790 SW 30th Ave, Hallandale Beach, FL 33009
Phone: (954) 477-7703
Website: https://www.expressroofsupply.com/
FAQ About Roof Repair
How much should it cost to repair a roof? Minor repairs (sealant, a few shingles, small flashing fixes) typically run $150–$600, moderate repairs (leaks, larger flashing/vent issues) are often $400–$1,500, and extensive repairs (structural or widespread damage) can be $1,500–$5,000+; actual pricing varies by material, roof pitch, access, and local labor rates.
How much does it roughly cost to fix a roof? As a rough rule of thumb, plan around $3–$12 per square foot for common repairs, with asphalt generally at the lower end and tile/metal at the higher end; expect trip minimums and emergency fees to increase the total.
What is the most common roof repair? Replacing damaged or missing shingles/tiles and fixing flashing around chimneys, skylights, and vents are the most common repairs, since these areas are frequent sources of leaks.
Can you repair a roof without replacing it? Yes—if the damage is localized and the underlying decking and structure are sound, targeted repairs (patching, flashing replacement, shingle swaps) can restore performance without a full replacement.
Can you repair just a section of a roof? Yes—partial repairs or “sectional” reroofs are common for isolated damage; ensure materials match (age, color, profile) and that transitions are properly flashed to avoid future leaks.
Can a handyman do roof repairs? A handyman can handle small, simple fixes, but for leak diagnosis, flashing work, structural issues, or warranty-covered roofs, it’s safer to hire a licensed roofing contractor for proper materials, safety, and documentation.
Does homeowners insurance cover roof repair? Usually only for sudden, accidental damage (e.g., wind, hail, falling tree limbs) and not for wear-and-tear or neglect; coverage specifics, deductibles, and documentation requirements vary by policy—check your insurer before starting work.
What is the best time of year for roof repair? Dry, mild weather is ideal—often late spring through early fall; in warmer climates, schedule repairs for the dry season and avoid periods with heavy rain, high winds, or freezing temperatures for best adhesion and safety.